Revised:
4/19
Frequently Viewed
If You Have Questions
- [email protected]
- 1-888-275-5737
- 785-296-6166
Quick Vids
5-Steps to Get Started
- New designated agents complete and submit Designation of Agent form (KPERS-2). To assign other user roles, use the EWP under Employer.
Employer Manual: Designated Agent for more info. - New users receive an email with a temporary password and a link to complete EWP enrollment.
- See if your web browser meets the minimum requirements for the EWP.
- Login to the EWP. Quick Vid: Login
- Get familiar with the portal. Quick Vid: Home Page
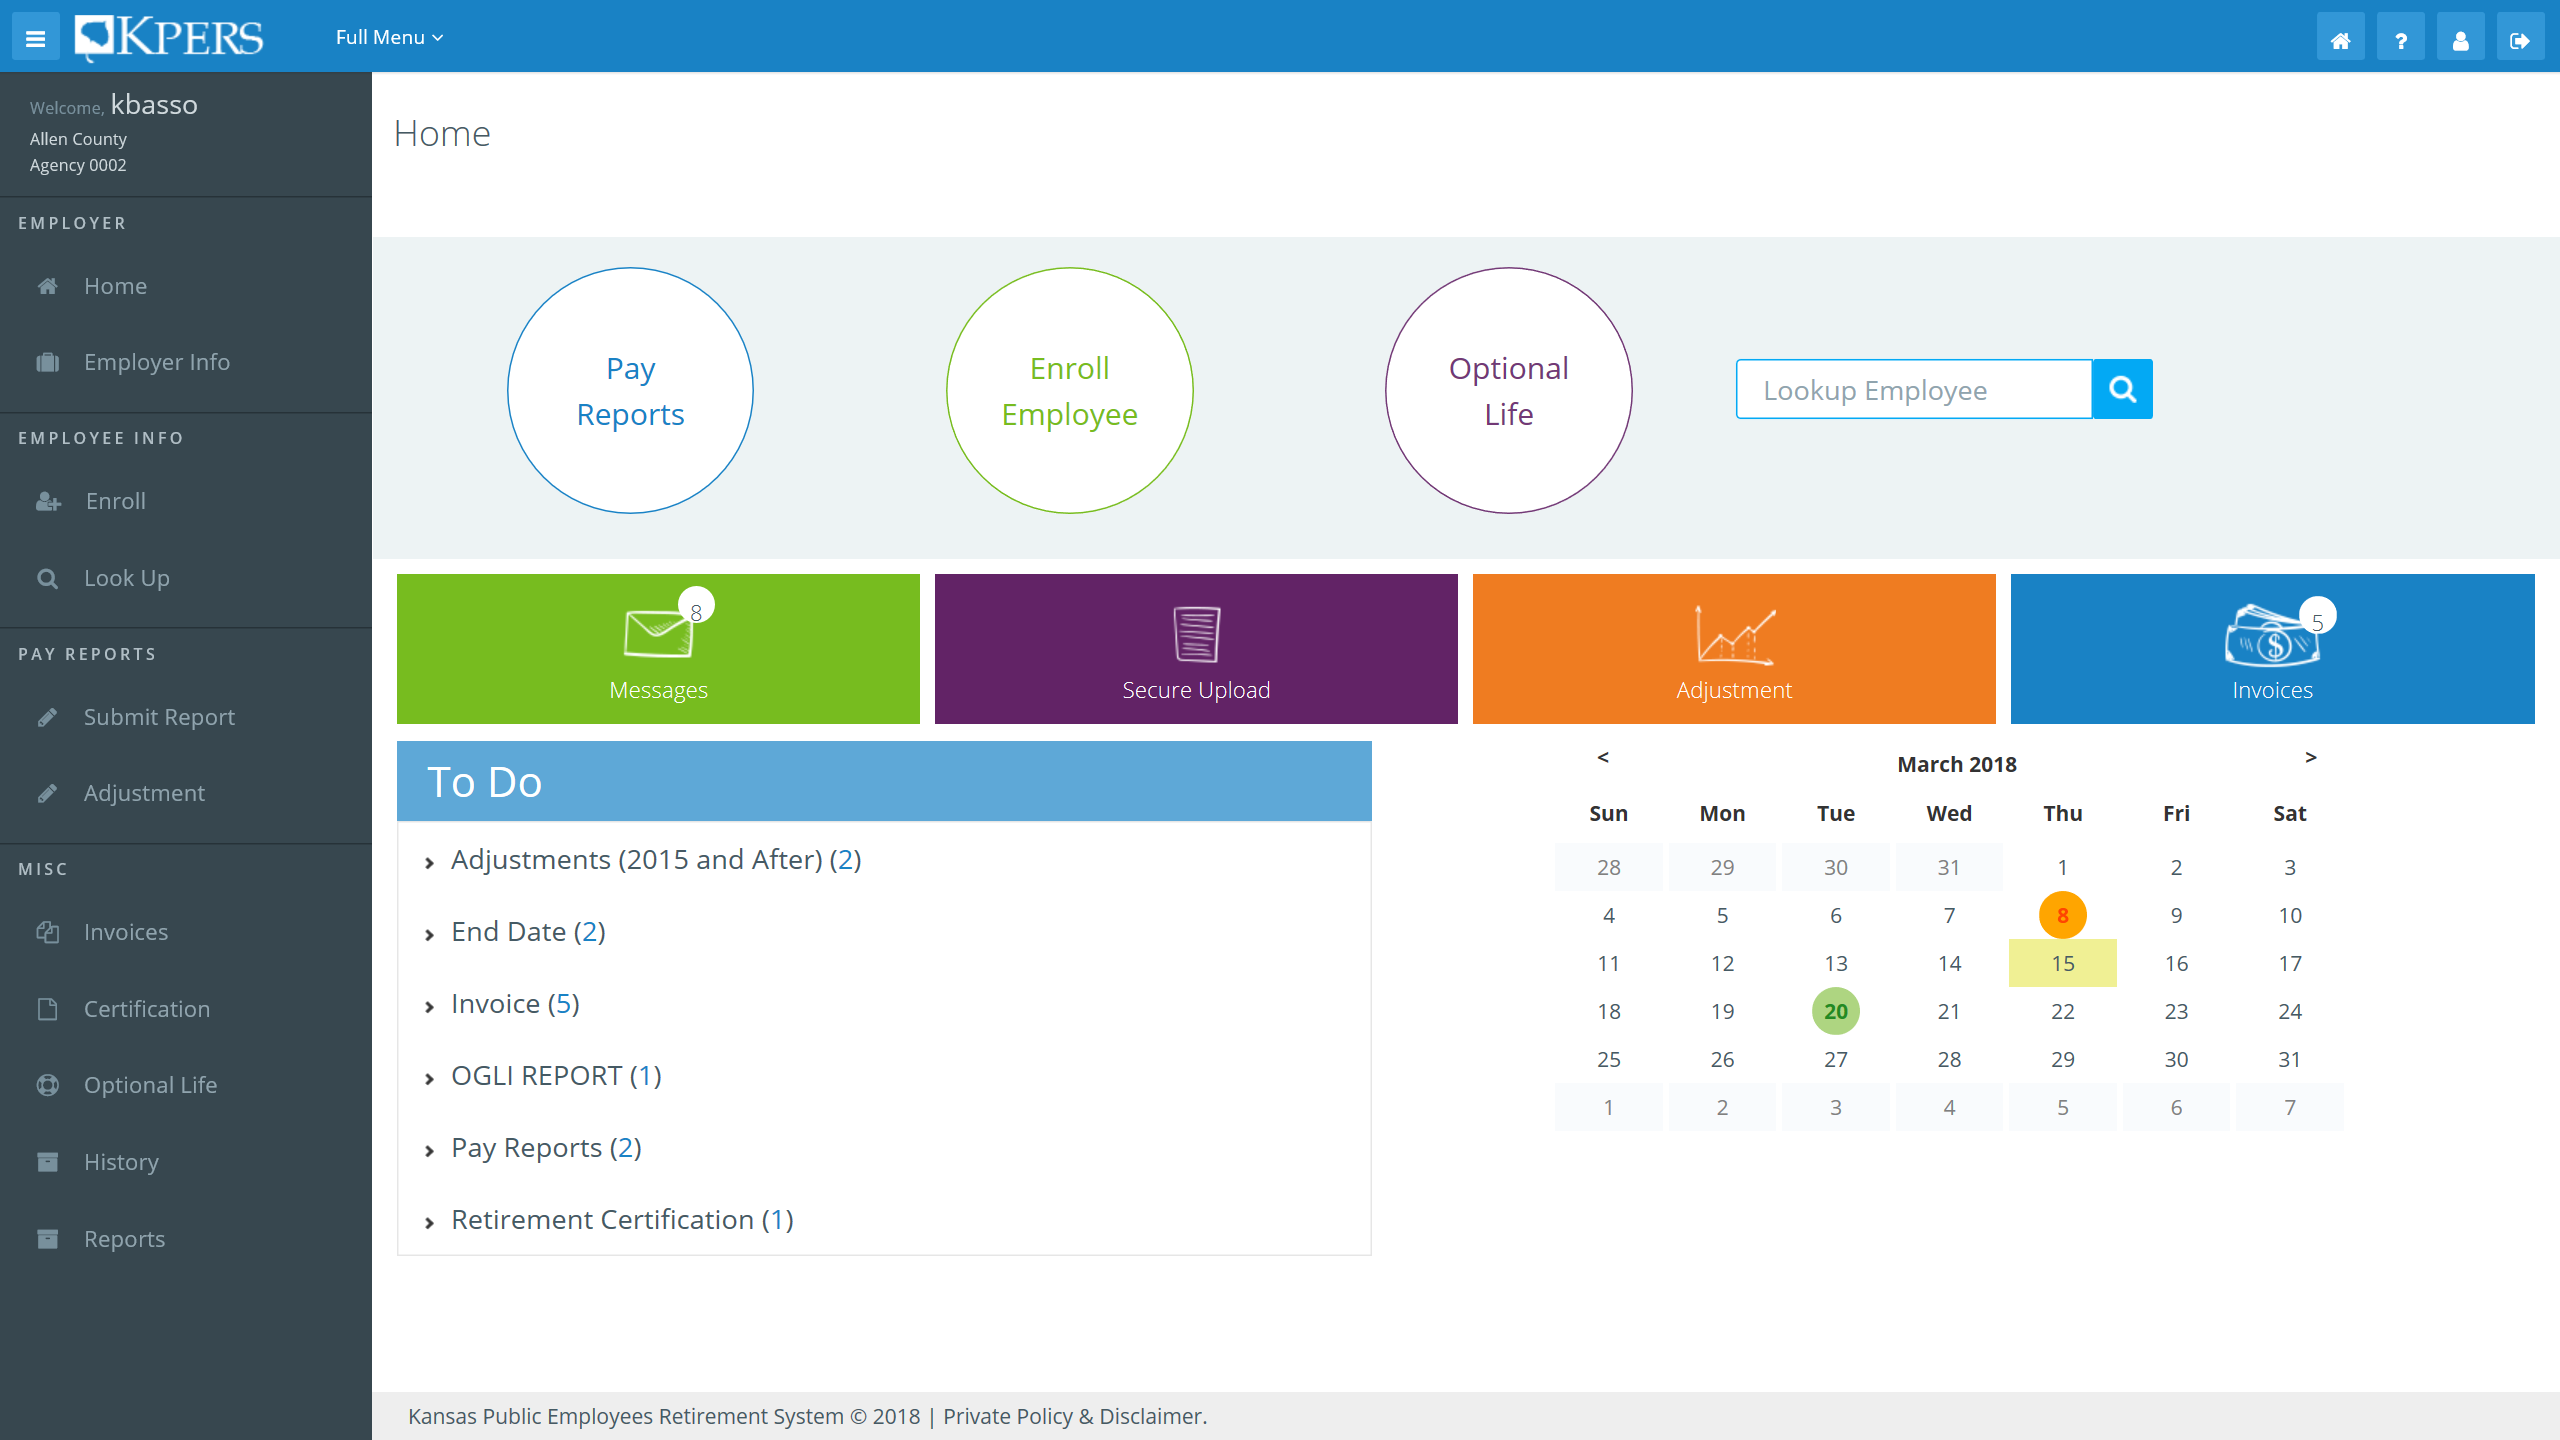
You can find everything you need to get started on the Home Page.
Top. Use this pull-down Full Menu for a link to all the functions on the EWP. If it's not on the Home page or Navigation Bar, look here.

Upper-right. Four buttons. Four important uses. See below.

Home button takes you to the home page.

Help button if you get stuck.

Agency button changes agency (only if you have access to more than one).

Log off button. Enough said.
The pay reporting process is one you’ll use a lot. That’s why we gave it a big round button you can’t miss. Quick Vid: Pay Reporting
If you’ve started a pay report but haven’t submitted, you’ll find it at the top of the Pay Report page. After submitting the report, you’ll make a payment.
Review the Employer Manual: Pay Reporting section for more detail.
Making Perfect Cents
Always try to pay the exact amount you owe. As a last resort, you can round to the nearest dollar (up or down) on your payment amount by clicking the “Override Calculation Button.”
Click this big round button when new employees start. Right away you’ll see enrollments that are still with you (haven’t been submitted) and the ones with us (haven’t been processed). You’ll also see if we need more information to complete the process. Quick Vid: Enrollments
If your employer offers optional life insurance, you’ll see a big button labeled, “Optional Life.” Quick Vid: Optional Group Life Insurance
On the OGLI page, you’ll see a list of all employees who had changes since the last premium report. You can submit the report, pay premiums and even enter end dates in this 3-step process.
For more, check out the OGLI section in the Employer Manual
Your EWP messages are a convenient, secure way to communicate with KPERS. It works a lot like email.
Unread Messages
If you have unread message, you’ll see a number on the Messages button. When you open Messages, your inbox will show unread emails in bold and a bright color.
Things You Can Do
- Send new message to specific KPERS staff member or by category
- Look for past messages using specific search criteria
- Export your inbox or message string
- Securely attach files to messages.
If there are tasks that need your attention (e.g. reports, certifications, etc.), they will show up in the To Do section of the home page. Go right to the thing you need to do by clicking the pull-down and the appropriate link.
For your convenience, there is a calendar on your home page. Today’s date is highlighted, and we’ll show you when your pay dates are and dates KPERS is closed for a holiday.
Use the quick “Lookup Employee” on the home page to get to an employee’s record quickly. Do a wider search by clicking Look Up under Employee Info on the navigation bar.
Use it from inside the EWP to send files to KPERS. Quick Vid: Secure Upload
Upload & Search
To upload, you need to pick which type of file you’re sending, business or support.
Business files are needed to complete a process and include enrollment, KPERS after-retirement lookup file, etc. They’re usually Excel files.
Support files are usually PDFs or image files (e.g. JPG, PNG) and help other activities. It could be a birth certificate for a retirement application or a marriage certificate to verify a spouse.
You can also search for files you've already sent. Search by category, status and date.
Generally, you’ll use adjustments to change previously reported contribution amounts for a member. It happens – no worries. The portal will walk you through the process. Employer Manual: Adjustments
Things You Can Do
- Step through and answer questions
- See all adjustments you haven’t submitted yet. Click on ones you want to finish up.
- See adjustments we’re working on and haven’t processed.
Adjustments are reviewed manually - not an automatic, overnight process.
Invoices are automatically generated after you’ve successfully submitted a pay report or OGLI premium report.
But you can also click on Invoices to check to see if you have any open or pending invoices. You can also see if you have any credits coming your way under the “credit” tab.